Installation
Flux is a robust, hand-crafted, UI component library for your Livewire applications. It's built using Tailwind CSS and provides a set of components that are easy to use and customize.
Prerequisites
Flux requires the following before installing:
Getting started
1
Install Flux
Flux can be installed via composer from your project root:
Copy to clipboard
composer require livewire/flux2
Activate your license
During the activation process, you will be prompted to enter an email and license key.
Once you've purchased a license key, you can now activate your project using the following command:
Copy to clipboard
php artisan flux:activateThe above command will create an auth.json file in your project's root directory. This file contains your email and license key for downloading and installing Flux.
Because auth.json is not version controlled, you will need to manually recreate it in every new project environment. View your licenses and their associated install instructions here ->
3
Include Flux assets
Now, add the @fluxStyles and @fluxScripts Blade directives to your layout file:
Copy to clipboard
<head> ... @fluxStyles</head><body> ... @fluxScripts</body>4
Set up Tailwind CSS
The last step is to set up Tailwind CSS. Flux uses Tailwind CSS for its default styling.
If you already have Tailwind installed in your project, just add the following configuration to your tailwind.config.js file:
Copy to clipboard
export default { darkMode: 'selector', content: [ ..., "./vendor/livewire/flux-pro/stubs/**/*.blade.php", "./vendor/livewire/flux/stubs/**/*.blade.php", ], ...};If you don't have Tailwind installed, you can learn how to install it on the Tailwind website.
5
Use the Inter font family
Although completely optional, we recommend using the Inter font family for your application.
Add the following to the head tag in your layout file to ensure the font is loaded:
Copy to clipboard
<head> ... <link rel="preconnect" href="https://fonts.bunny.net"> <link href="https://fonts.bunny.net/css?family=inter:400,500,600&display=swap" rel="stylesheet" /></head>You can configure Tailwind to use this font family in your tailwind.config.js file:
Copy to clipboard
export default { ... theme: { fontFamily: { sans: ['Inter', 'sans-serif'], }, },};Disabling dark mode
If you don't want your application to support dark mode, you will need to change darkMode from 'selector' to null in your tailwind.config.js file:
Copy to clipboard
export default { darkMode: null, ...};Publishing components
To keep things simple, you can use the internal Flux components in your Blade files directly. However, if you'd like to customize a specific Flux component, you can publish its blade file(s) into your project using the following Artisan command:
Copy to clipboard
php artisan flux:publishYou will be prompted to search and select which components you want to publish. If you want to publish all components at once, you can use the --all flag.
Keeping Flux updated
To ensure you have the latest version of Flux, regularly update your composer dependencies:
Copy to clipboard
composer update livewire/flux livewire/flux-proIf you've published Flux components, make sure to check the changelog for any breaking changes before updating:
Activating in CI
If you are using Flux in a CI environment without an auth.json file, you can add the following environment variables and command to your CI script:
Copy to clipboard
composer config http-basic.composer.fluxui.dev "${FLUX_USERNAME}" "${FLUX_LICENSE_KEY}"Activating using Laravel Forge
If you are using Laravel Forge, you can take advantage of their built in Composer credentials feature for
authenticating private composer packages.
Laravel Forge allows you to manage Composer credentials on a server or site level. If you have multiple sites using Flux, then it's recommended to manage Composer credentials
on the server level.
To authenticate Flux, head over to the Composer credentials section (Runtime > PHP on the server, or Settings > Composer on a site). You will then see the following:
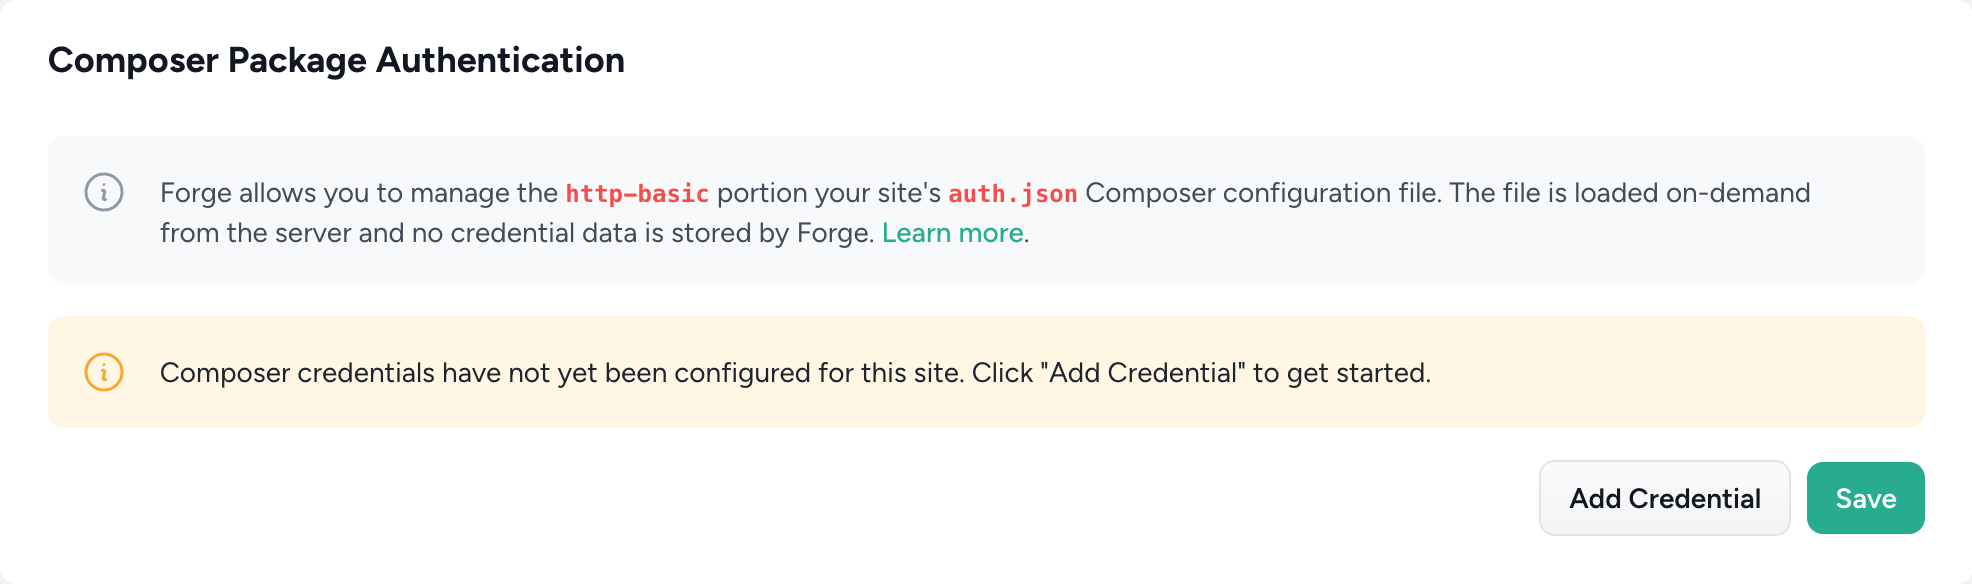
Click the "Add Credential" button to authenticate with a new private composer package and enter the following details:
- Enter composer.fluxui.dev as the Repository URL
- Enter your Flux account email as the username
- Enter your Flux license key as the password
Finally, click the "Save" button. You should now be authenticated with the Flux private composer server and be able
install Flux using composer require livewire/flux-pro
For more information, please refer to the Laravel Forge Packages documentation.
Configuring nginx
If you run into problems loading Flux's JavaScript and CSS assets, you may need to configure your nginx server to allow for this.
By default, Flux exposes two routes in your application to serve its assets from: /flux/flux.js and /flux/flux.css.
This is fine for most applications, however, if you are using nginx with a custom configuration, you may receive a 404 from this endpoint.
To fix this issue, you can add the following to your nginx configuration:
Copy to clipboard
location ~ ^/flux/flux(\.min)?\.(js|css)$ { expires off; try_files $uri $uri/ /index.php?$query_string;}
Copyright © 2026 Wireable LLC ·Terms of Service